The Dental Implant Procedure: A Detailed Step-by-Step Guide
The process of receiving a dental implant is a multi-stage journey meticulously designed to ensure the proper integration of the implant with the jawbone and its long-term success. It is generally not a “one-day” solution for single tooth replacements, although certain full-mouth procedures may be marketed with accelerated timelines under specific conditions.
Step 1: Initial Consultation and Comprehensive Assessment
The foundational step in the dental implant process is a thorough initial consultation. During this appointment, the dental professional conducts a comprehensive examination of the patient’s oral health, including a detailed review of their medical and dental history.14 Advanced diagnostic tools, such as X-rays and CT scans, are utilized to precisely evaluate the bone density, quantity, and overall structure within the jawbone. This imaging also helps in assessing the optimal placement sites for the implants.14 Impressions of the patient’s teeth may also be taken to create accurate models for planning.14 Based on this comprehensive assessment, the dentist or oral surgeon determines if the patient is a suitable candidate for dental implants and develops a personalized treatment plan. This plan outlines the specific number and type of implants required, as well as any necessary preparatory procedures.15
Step 2: Preparatory Procedures (If Needed)
The need for preparatory procedures is common, as approximately 60% of dental implant patients in Chicago require at least one additional treatment to ensure proper implant stability and integration.19 These procedures can significantly impact the overall timeline and cost.
- Tooth Extraction: If the damaged or decayed tooth that the implant will replace is still present, it must be surgically removed. This extraction is followed by a necessary post-extraction healing period before implant placement can proceed.15
- Bone Grafting: A critical prerequisite for many patients, bone grafting is performed when there is insufficient bone material in the jawbone to adequately support the dental implant.1 This procedure involves adding bone material to the jawbone, which then requires several weeks or months (typically 3-6 months) for the new bone to integrate and grow sufficiently dense to anchor the implant.15
- Sinus Lift: Specifically for upper jaw implants, a sinus lift may be necessary if the maxillary sinus cavity is too close to the implant site, preventing adequate bone height for implant placement. This procedure involves lifting the sinus membrane and placing bone graft material to create sufficient vertical bone dimension.19
- Ridge Augmentation: This procedure is performed to rebuild or reshape the bone ridge in the jaw, which may have deteriorated after tooth loss, providing a more stable and appropriately contoured foundation for implant placement.19
These preparatory steps are not mere additions but often essential foundations for the success of the implant. The necessity of these procedures means that the initial quoted price for an implant is often a baseline, and the true financial commitment requires a comprehensive diagnostic evaluation to identify all necessary preliminary steps.
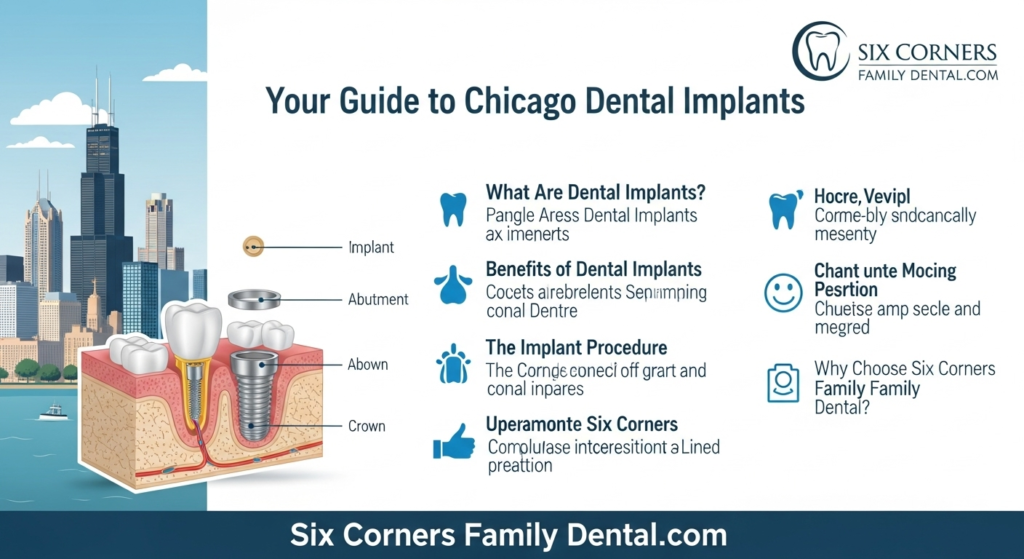
Step 3: Surgical Placement of the Dental Implant Post
Once the jawbone is deemed ready, the titanium implant post is surgically inserted into the jawbone beneath the gumline. This procedure is typically performed under local anesthesia to minimize patient discomfort and generally takes about 1-2 hours per implant.16 The implant post is precisely positioned to serve as the new, artificial tooth root.14 In some cases, a temporary top or restoration may be placed over the implant immediately after surgery to maintain aesthetics and function during the subsequent healing period.15
Step 4: The Critical Healing Phase: Osseointegration
Following implant placement, a crucial and often lengthy healing period begins. This phase is characterized by a biological process called osseointegration, where the patient’s jawbone naturally fuses and bonds directly with the titanium surface of the implant.1 Osseointegration is fundamental for the implant’s stability and long-term success, as it establishes the implant as a solid, integrated part of the jaw, mimicking a natural tooth root.1
This healing process is not merely a waiting period but an active biological investment. It typically takes anywhere from 3 to 6 months for complete osseointegration to occur, though individual healing factors and the complexity of the case can cause this timeframe to vary.15 During this time, patients may wear temporary restorations to maintain aesthetics and functionality, and a soft diet is often recommended to avoid stressing the healing implant.15 Patience during this phase is paramount, as rushing or compromising the osseointegration process can lead to implant failure.

Step 5: Abutment Placement
Once osseointegration is successfully completed, typically after several months, a minor second surgical procedure may be performed. In this step, a healing cap or the final abutment is placed on the head of the integrated implant.14 The abutment is the small connector piece that protrudes above the gumline, designed to serve as the secure anchor for the final artificial tooth.2 This step prepares the implant site for the attachment of the crown, bridge, or denture.
Step 6: Final Restoration: Attaching the Crown, Bridge, or Denture
With the abutment in place and the surrounding gum tissue healed, impressions of the patient’s mouth are taken. These impressions serve as a blueprint for fabricating the custom-made permanent crown, bridge, or denture. The final restoration is meticulously designed to match the patient’s natural teeth in color, shape, and size, ensuring a seamless and aesthetically pleasing result.15 This artificial tooth is then either cemented or screwed onto the abutment, completing the visible and functional part of the dental implant.14
Step 7: Post-Placement Care
The long-term success and longevity of dental implants depend significantly on diligent post-placement care. This includes consistent daily oral hygiene practices, such as regular brushing and flossing, tailored to the specific type of implant-supported restoration.1 For single implant-supported crowns, care is similar to natural teeth. For bridges or full-arch restorations, specific cleaning techniques, such as using floss threaders, may be recommended.1 Regular professional cleanings and check-ups with the general dentist (at least twice yearly) and potentially the surgical specialist (at least once yearly) are essential to monitor the implant’s health and the surrounding tissues.1 This ongoing commitment to oral hygiene and professional follow-up is crucial for realizing the full lifespan potential of the implant.